
Please note! JagDroid is suitable for a competent DIYer to install, however some customers choose to pay a local garage or car audio install company to fit their system instead. If this is the case, please note that JagDroid Ltd will not be responsible for any removal/refitting costs charged by a third party in the event the unit needs to be sent back for warranty repair.
If intending to install a reverse camera it is advised to check the intended cabling route in order to make a decision on whether you wish to go ahead with this part of the install, as the cable routes can be challenging.
First make a note of the PIN code which is printed underneath the CD/MD/Cassette unit, for those regions where PIN security is used, you will need this when you power up the unit.
Here’s how to install your converted system:
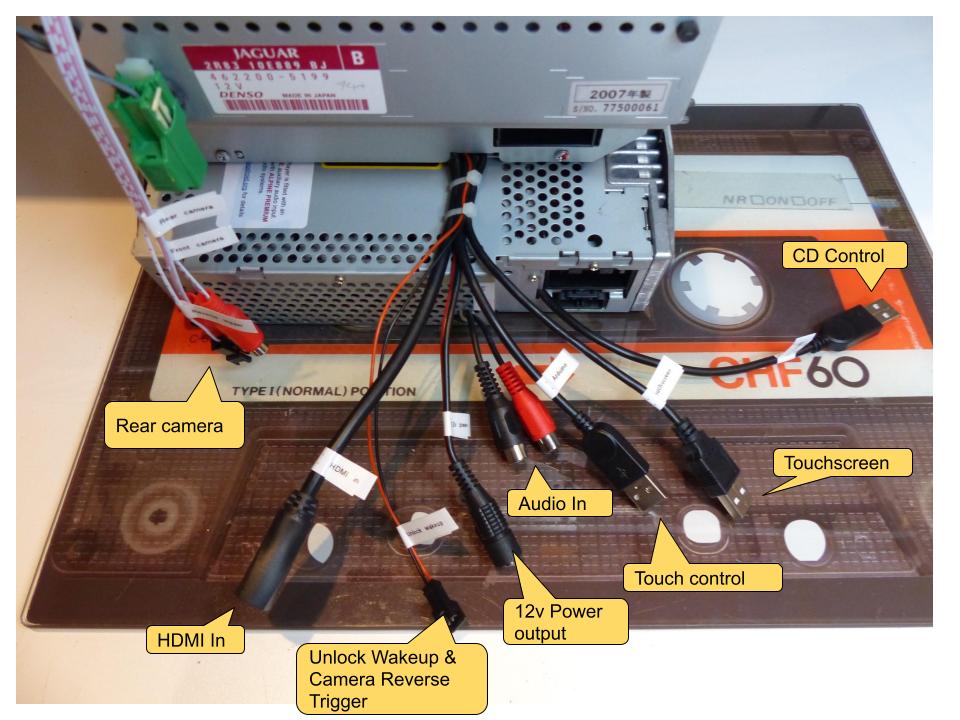
This image shows the additional connections your head unit will now have after conversion, and the additional connections fitted to the CD player. This guide shows a non-TV unit – the TV equipped units have identical connectivity but due to the different chassis the cable outlet is in a different location, and the 4 x Analogue TV antenna connections are no longer used as the TV board is removed as part of the JagDroid upgrade.
Normal non-TV model:
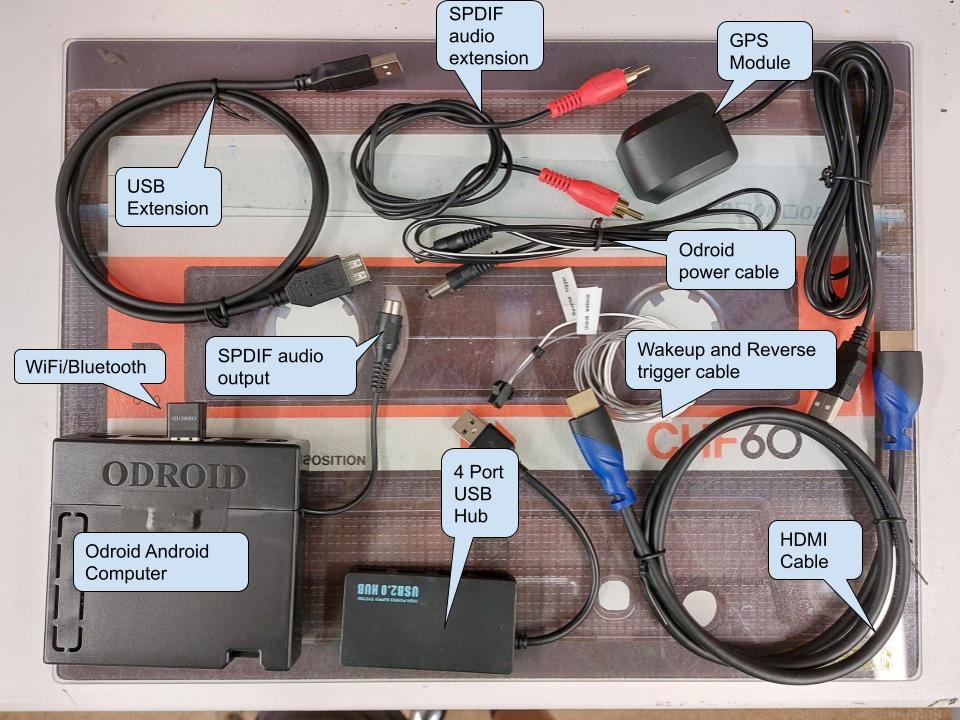
You then need to identify the following parts that you have either ordered separately or received as part of a pre-built conversion – this is what you’ll have if your car has the STANDARD AUDIO system (scroll down for ALPINE PREMIUM systems):
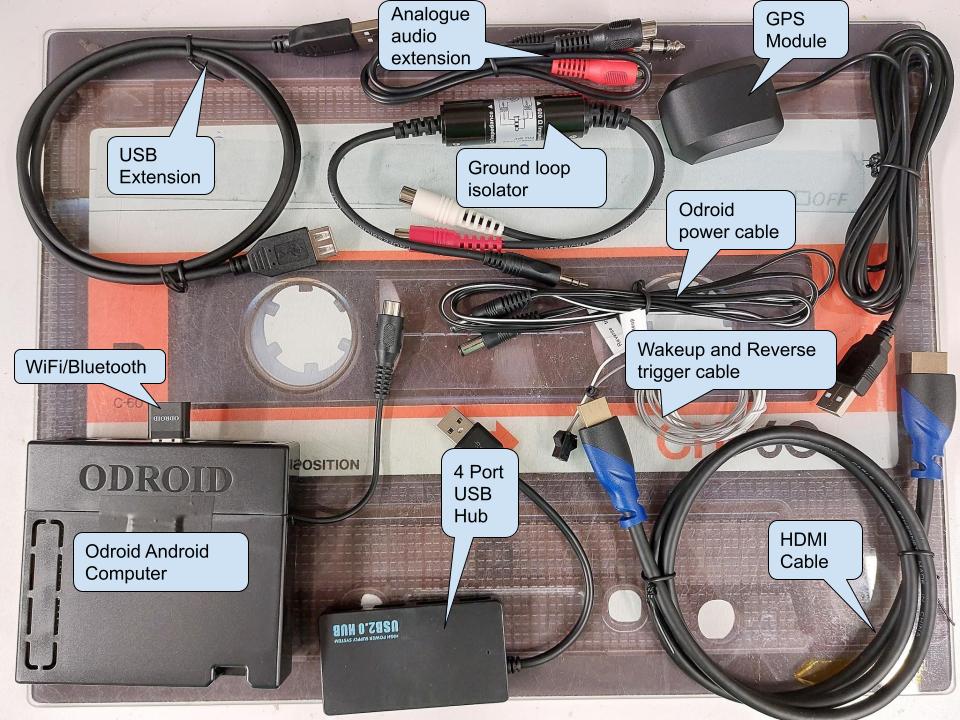
If your car has the PREMIUM AUDIO system you’ll have the following:
The Odroid unit can be hidden under the passenger footwell and tucked away up on top of the ECU module (metal box attached under the glovebox). All cables can then run under the glovebox and enter the area at the rear of the head unit ready for connection.
Or if you prefer to keep it easily accessible you can install it in the glovebox – you may have to drill a suitable size hole with a holesaw in the back of the glovebox to route the cables.
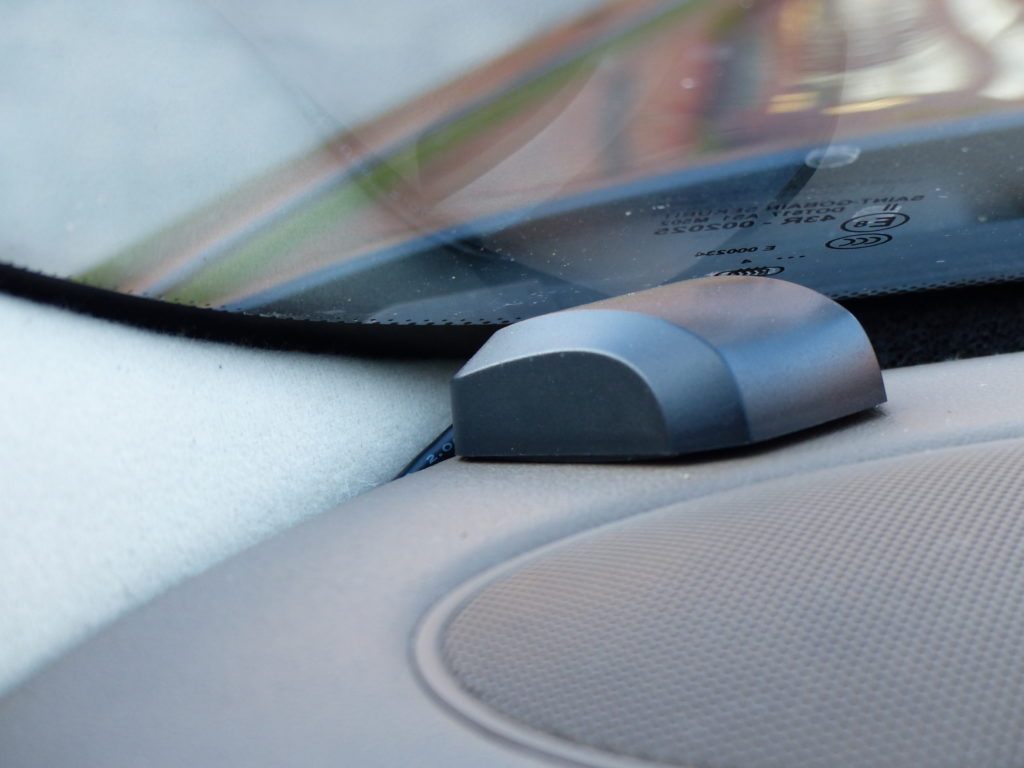
The GPS module should be installed up on the dash in the corner of the window at the passenger side. This avoids the heater wires in the windscreen (where fitted) and will give the strongest signal. There is no need to remove the adhesive base (if fitted), as it’s secure enough without:
The cable is easily fed down under the glovebox to the Odroid by temporarily removing the dash side trim panel revealed when the passenger door is opened. Use a trim removal tool to open the panel:
Don’t be tempted to hide the GPS module away in the glovebox or behind the dash – it may appear to work initially but won’t receive a strong enough signal to get a GPS lock.
The connection process then is as follows:
TIP: Some of the connectors can easily be accidentally disconnected during the install, it might be helpful to secure each plug & socket together with a small piece of PVC tape
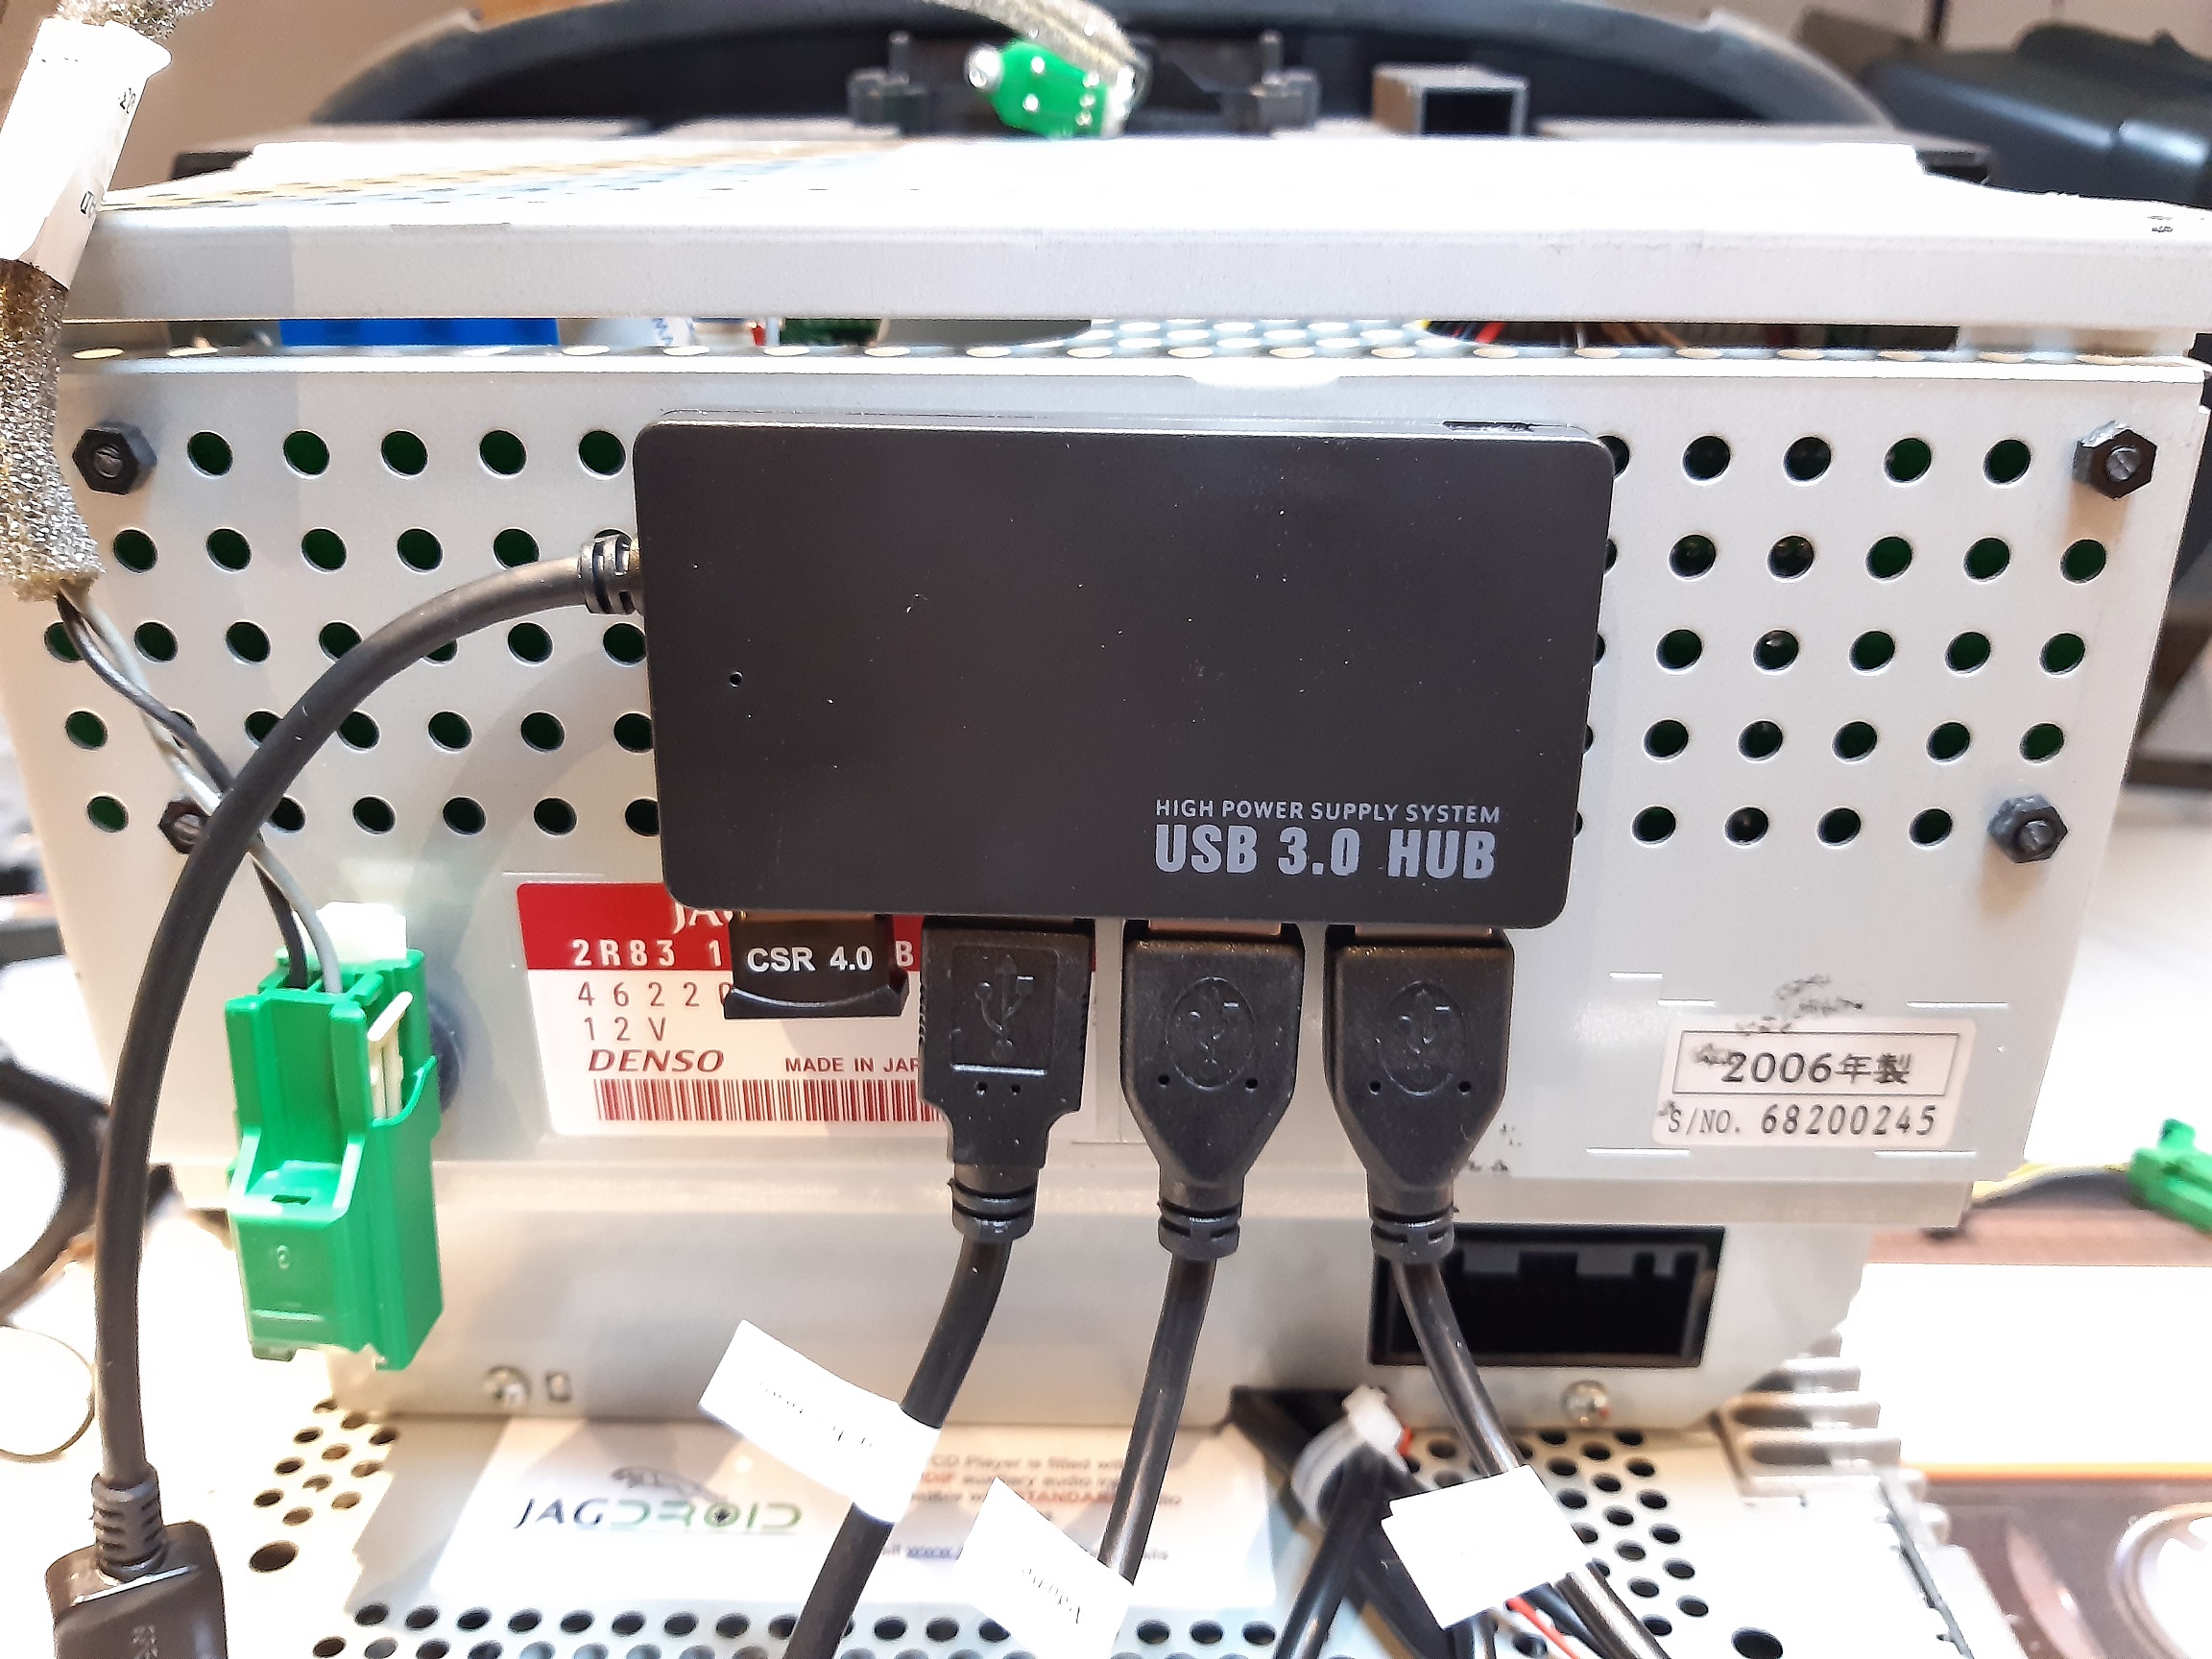
The USB hub will be located behind the touchscreen/CD unit when it is mounted in the dash. Connect the following devices to the USB hub:
- Plug the TOUCHSCREEN USB connector into the USB HUB
- Plug the SCREEN CONTROL USB connector into the USB HUB
- Plug the CD CONTROL USB connector into the USB HUB
- Plug the short male USB cable from the hub into the female end of the USB Extension Cable then run the Extension Cable to the Odroid location.
- You can attach the hub to the rear of the touchscreen with a self-adhesive pad like this:
Next there are USB devices that should be connected into the Odroid computer:
- Plug the WIFI/BLUETOOTH USB module into one of the main ODROID USB ports
- Plug the USB GPS RECEIVER into one of the main ODROID USB ports
- Plug the other end of the USB Extension Cable that is plugged into the USB hub into one of the main ODROID USB ports.
Connect the power to the Odroid:
- Plug the ODROID POWER cable into the ODROID power jack and the other end into the 12V POWER connector on the head unit
Connect the HDMI video cable from the Odroid to the touchscreen:
- Plug the HDMI CABLE into the ODROID and the HDMI INPUT socket on the head unit
Connect the audio cables to the aux-input on the CD player:
- If your car is fitted with STANDARD AUDIO:
- Plug one end of the SPDIF EXTENSION cable into the ODROID SPDIF OUT socket, and the other end to the AUX AUDIO IN on the head unit – don’t worry if the cable colour differs from the socket colour
- If your car is fitted with PREMIUM AUDIO:
- Plug the GROUND LOOP ISOLATOR into the ODROID 3.5mm audio socket on the back side of the Odroid
- Plug the Red/Black plugs of one end of the ANALOGUE AUDIO EXTENSION cable into the L/R audio out of the GROUND LOOP ISOLATOR, and the other end into the AUX AUDIO IN on the CD player (the CD player sockets may be YELLOW & GREEN – YELLOW = Left channel (Black), GREEN = Right channel (Red))
Add the optional WAKE-UP cable (this starts the Odroid booting up when you unlock the car, for a faster startup):
- Plug the combined UNLOCK WAKEUP/ REVERSE TRIGGER connector into the matching connector on the head unit.
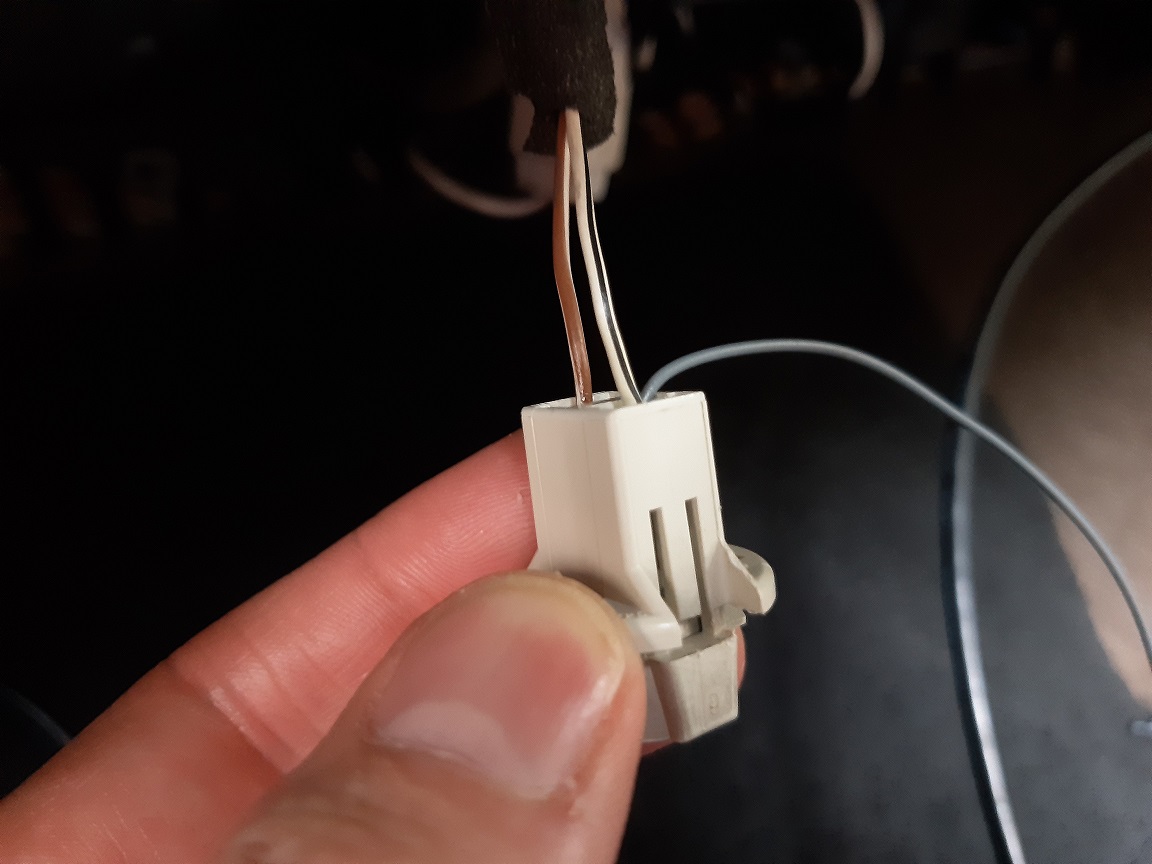
- Remove the passenger footwell lamp holder from its bracket by giving it a half turn and lifting it out, which will give you better access to the wiring
- The GREY wire marked UNLOCK WAKEUP connects to the WHITE/BLACK striped wire going to the lamp socket. You may choose to extract the terminals of the lamp socket and solder your wires to the metal tabs, or alternatively splice into the wires ensuring they are insulated from accidental short-circuit.
- This wire will be pulled to GROUND by the car electronics when the footwell lamp illuminates, which in turn triggers the JagDroid unit to power up the Odroid.
- It will look like this:
Add the optional REVERSE TRIGGER cable (this switches to the REVERSE CAMERA input when reverse gear is selected):
- Please see the Reverse Camera Installation page
Now power everything up and enjoy your system!
Please check and confirm that the Odroid computer shuts down after 10 mins when the ignition is switched off (the blue and red lights will switch off). If the Odroid does not shut off after this time, you will need to perform a reset by disconnecting the main car battery terminals, then reconnect after 20 seconds.
Then please check again, and the Odroid should shut off after 10 mins of the ignition being switched off.
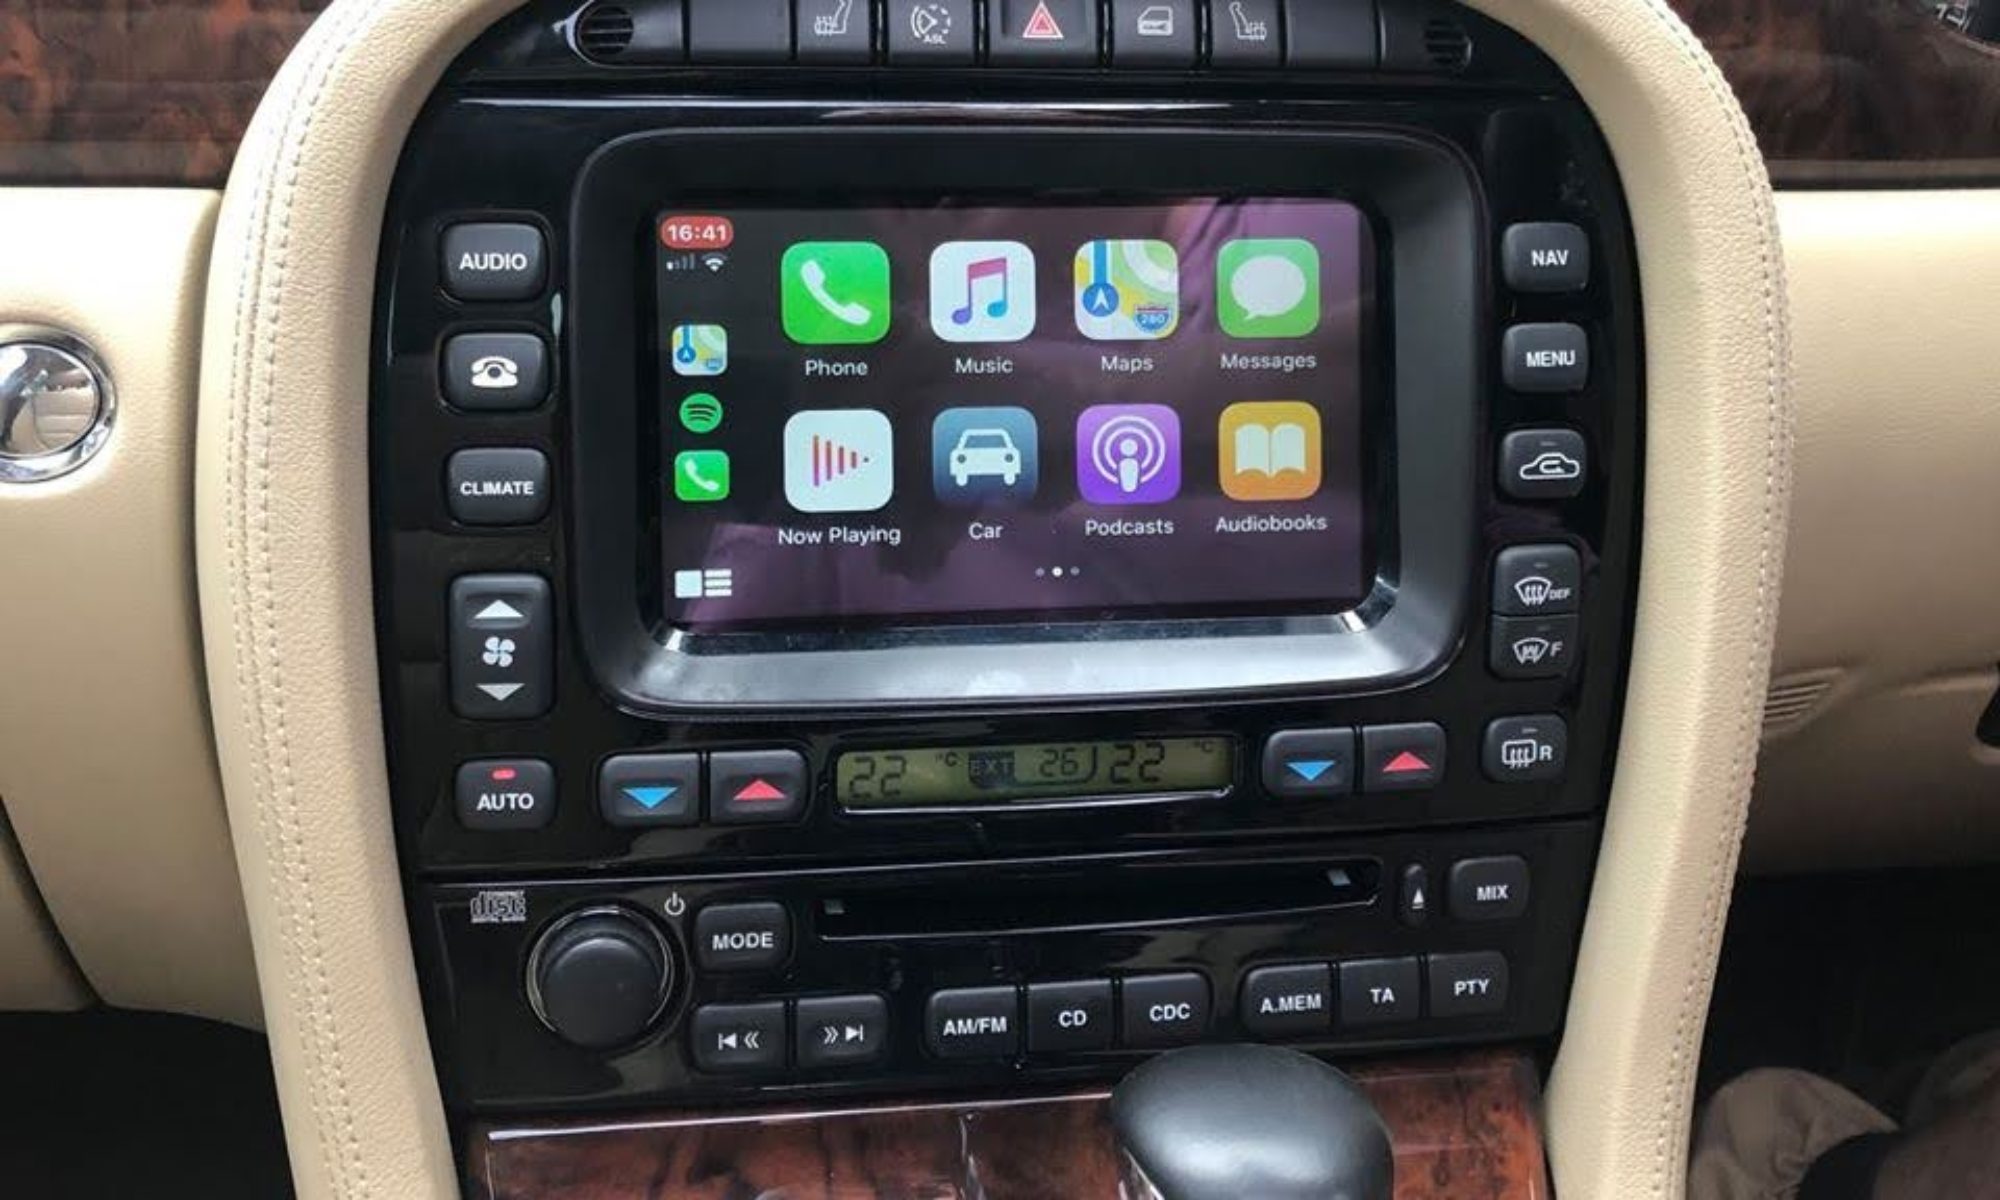
If you have ordered the optional CarPlay kit please follow these instructions: Click here for CarPlay instructions
Have a read of the Next Steps page for recommended Apps and add-ons